Virtual Appliance Setup
Once you create a remote in SecureX orchestration, you can deploy the virtual appliance OVA and apply the configuration you downloaded. Here’s a summary of this process:
- Download the latest version of the SecureX orchestration remote OVA.
- Generate an SSH key pair and console password.
- Deploy the OVF template.
- Verify remote connectivity.
- (Optional) Define NTP servers.
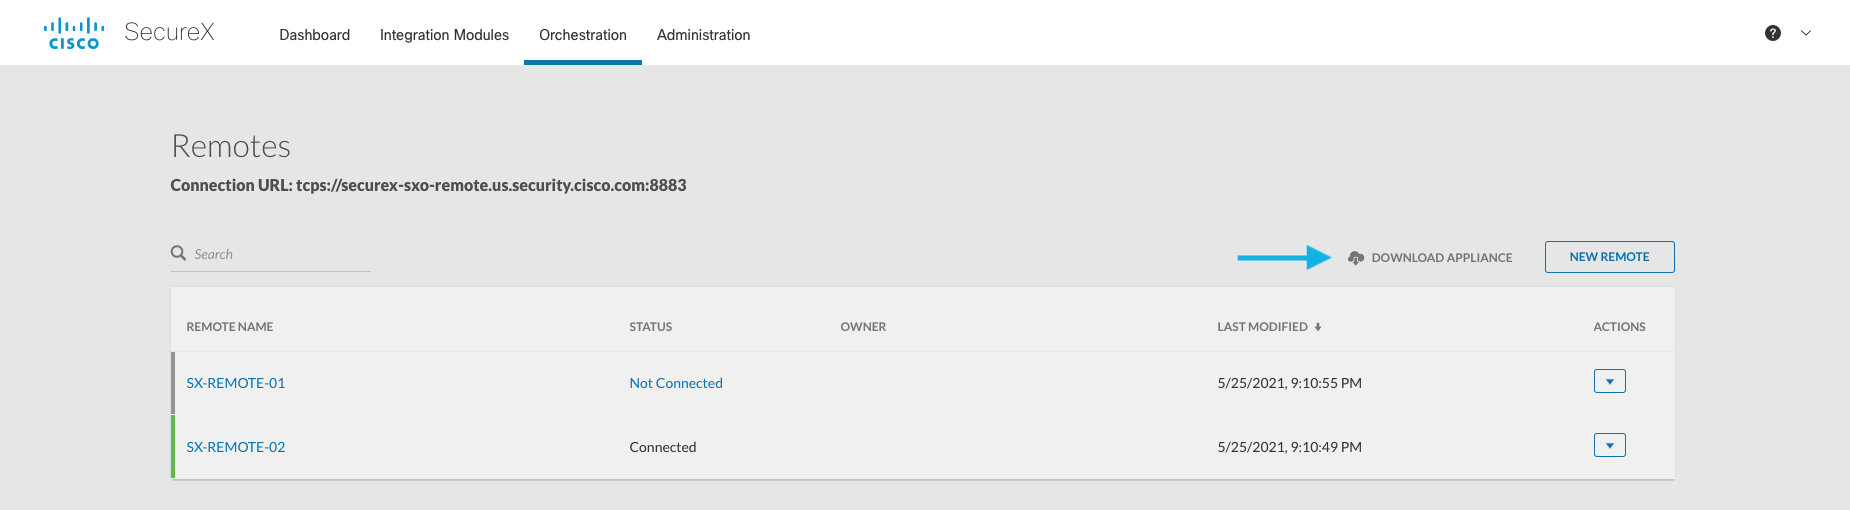
Download the OVA
- In SecureX orchestration, navigate to the Remote Configuration page (under the Admin section).
- Click the Download Appliance link next to the New Remote button:
If you want to verify the file hash of the OVA, please refer to the following table:
| File Name | File Size | SHA256 Hash |
|---|---|---|
| sxo-remote-1.6.ova | 1.6 GB | 2cc3ffc5cb753d20ffc438598f1246b44dca7e1145cbfcb48da68fc9daa193c3 |
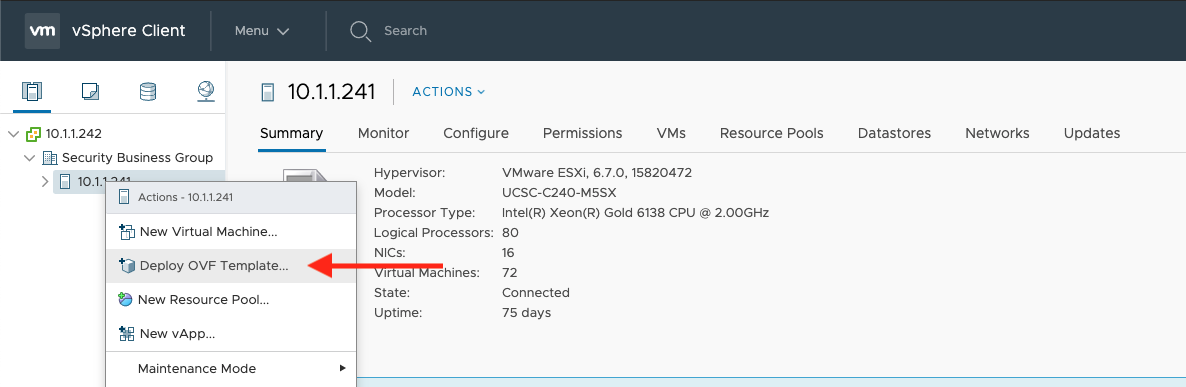
Deploying the VM
-
In your VMware vCenter client, right click on the folder you want to deploy the remote in and select Deploy OVF Template:
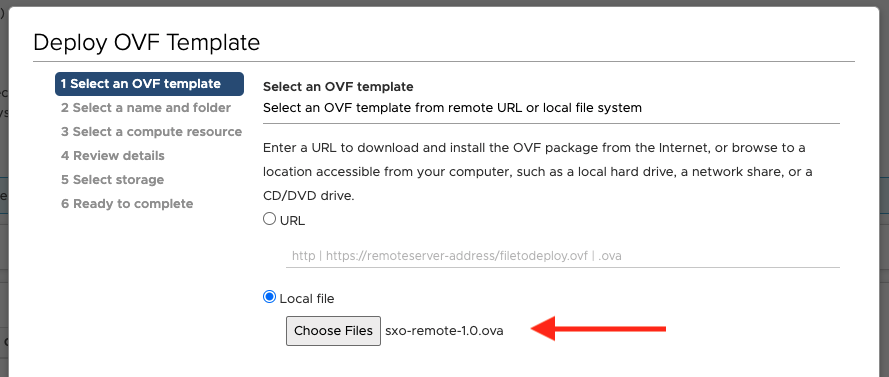
-
Select the Local file option, select the remote OVA you downloaded, and click Next:
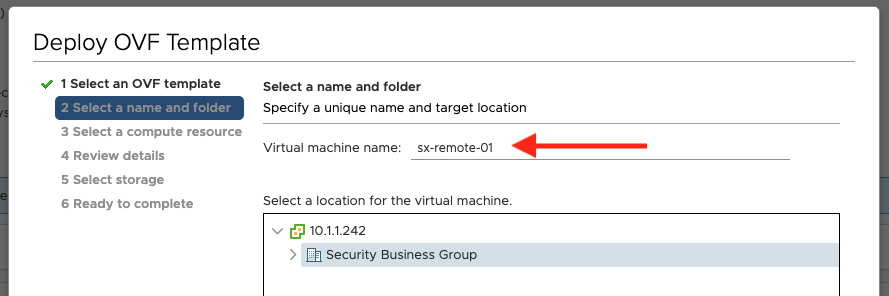
-
Give the virtual appliance a unique name, confirm the machine’s location, and click Next:
-
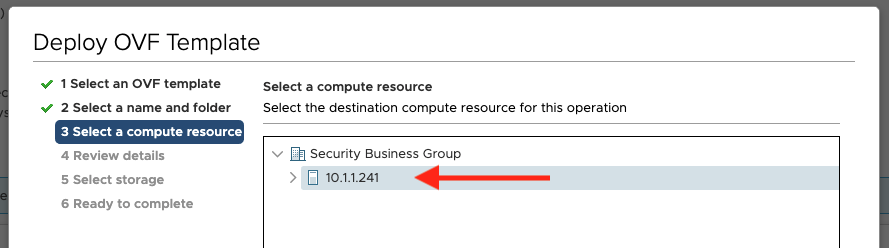
Select the compute resource to deploy the virtual appliance on and click Next:
- Review the details of the deployment and click Next.
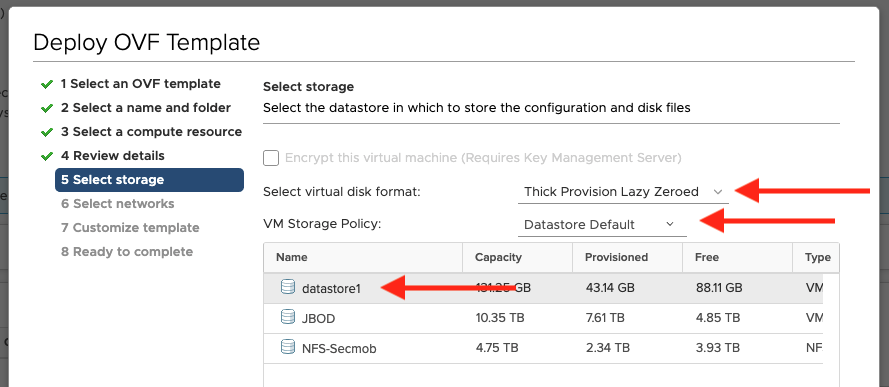
- Select the datastore you want to use for the virtual appliance and click Next.
- Note: We recommend a minimum of 30 GB of disk space be available for an orchestration remote.
- Note: We recommend a minimum of 30 GB of disk space be available for an orchestration remote.
-
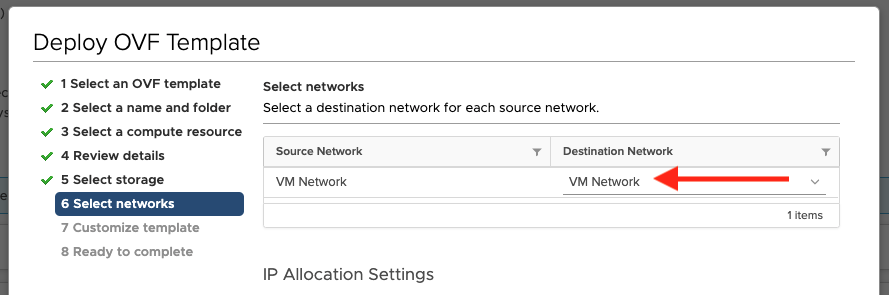
Select the network you want to deploy the virtual appliance on and click Next:
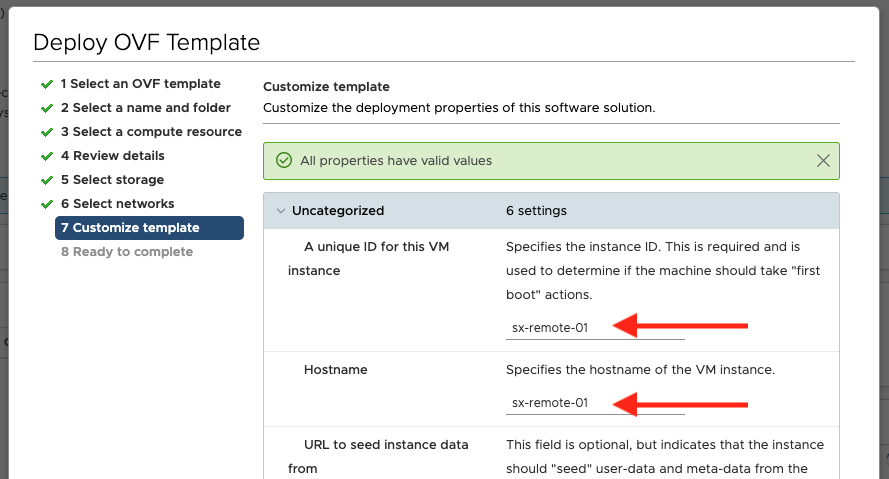
- On the customize template screen, you’ll need to provide some information:
-
Provide a unique ID and hostname for the virtual appliance:
- (Optional) Provide an SSH public key for SSH access (see these instructions).
- Set
Encoded user-datato the contents ofremoteconfig.txt(from theremotePackage.zipyou downloaded during remote creation). -
Provide a password for the virtual appliance for console access (the username will be
ubuntu).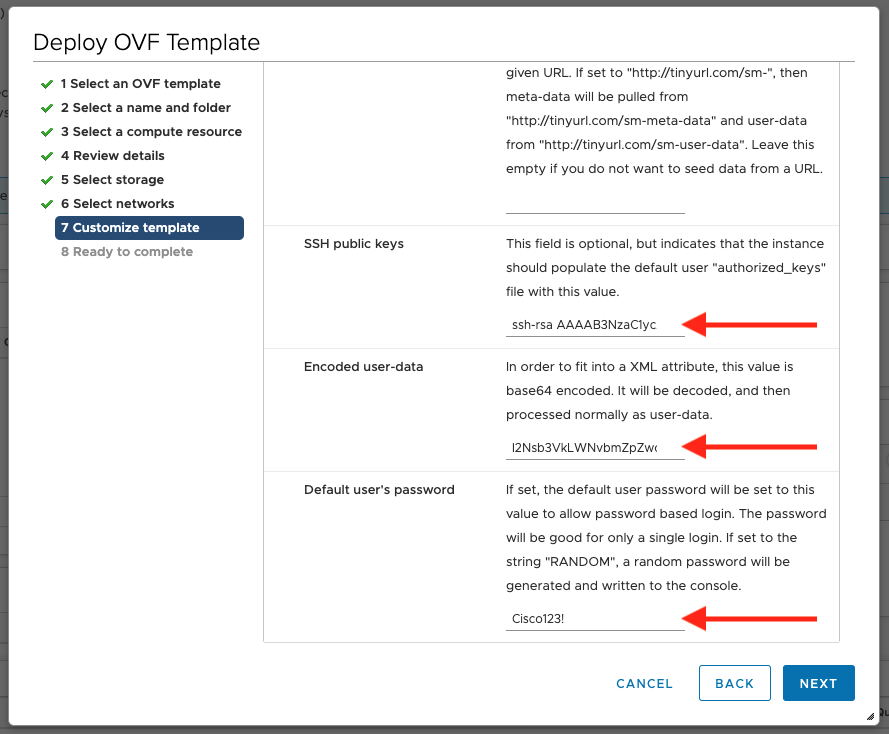
- Click Next.
-
- Review all of the virtual appliance’s details and, if everything looks correct, click Finish.
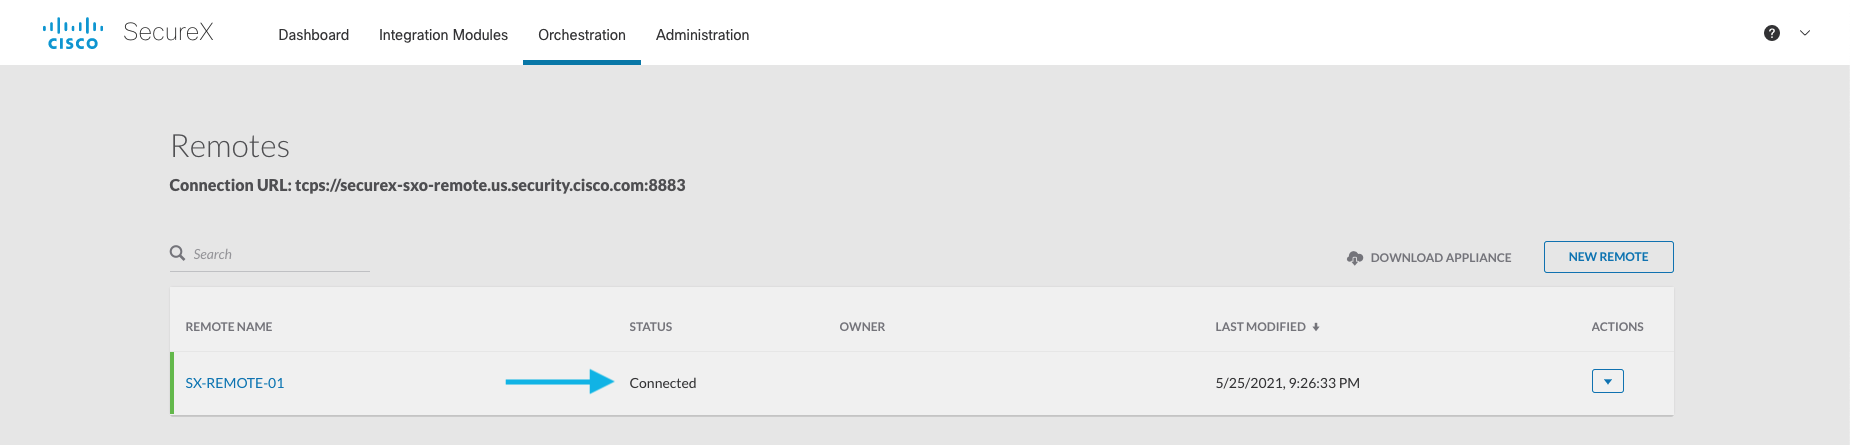
Once the virtual appliance finishes deploying, be sure to power it on! Once online, the remote’s status should change from Not Connected to Connected on the remotes list in SecureX orchestration. Note that a newly deployed remote can take up to 10 minutes to show as connected!
(Optional) Define NTP Servers
After deploying your SecureX orchestration remote, you can configure the virtual appliance to use custom NTP servers using these steps:
- Log in to your virtual appliance by either:
- Opening a console to the VM in vCenter and logging in with your password; or
- SSHing to the VM using the key pair you created during setup.
- Open the file
/etc/chrony/chrony.confand change the NTP servers to your preferred servers. - Save and close the file.
- Run the following command to restart the NTP service and check that the time is correct:
systemctl restart chronyd ; watch chronyc tracking.
Generating an SSH Key Pair
If you want to be able to SSH to your remote appliance, you’ll need to generate a key pair for authentication. You can use any key pair you want, as long as it’s valid for a standard Ubuntu authorized_hosts file. Below, we give examples of how to generate a default RSA key pair.
Linux/macOS
- Open a terminal.
- Execute the command:
ssh-keygen -t rsa -b 4096 -f /path/to/output/keypair(for a 4096-bit RSA key). - If you want to use a passphrase, provide it and then confirm it. If not, press enter twice.
- A public and private key will be generated at the path you provided. In this example:
keypairwill contain the private key.keypair.pubwill contain the public key.
Windows
One of the easiest ways to generate a key pair on Windows is by using the PuTTygen utility:
- Download PuTTygen from this page (look for
puttygen.exeunder Alternative binary files). - Run
puttygen.exe. - If you want a passphrase on your key pair, provide it in Key passphrase and Confirm passphrase.
- Select the type of key and key length at the bottom of the window (we recommend at least a 2048-bit RSA key).
- Click the Generate button.
- Use the Save public key and Save private key buttons to export the keys.
Next Steps
Now that you’ve deployed the orchestration remote virtual appliance, you can configure your on-premises targets to use it!