Triggers
Triggers cause a workflow to execute when an event happens or based on a schedule.
Workflow Properties
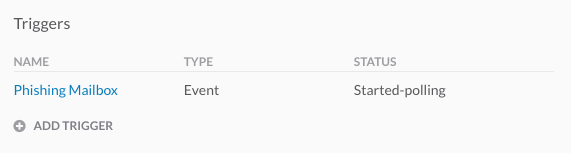
When viewing a workflow’s properties, you’ll see a Triggers section that shows any triggers the workflow has and their status. Here’s a sample of what this looks like for an Email Event:
Configuration
To configure a trigger, you first need to make sure you have an event or schedule configured. Once you have one of those, you can add a trigger to your workflow.
- Open the workflow you want to trigger in the workflow editor and scroll down to the Triggers section in its properties.
- Click the Add Trigger button.
- Give the trigger a meaningful name.
- Select the Type of trigger based on whether or not you’re using an event or schedule.
- If using a schedule: select the schedule to use.
- If using an event: select the event to use.
- If you want to create the trigger but prevent it from executing your workflow, you can check the Disable Trigger box. If you leave this unchecked, the workflow will be executed by the trigger.
- Click the Save button.
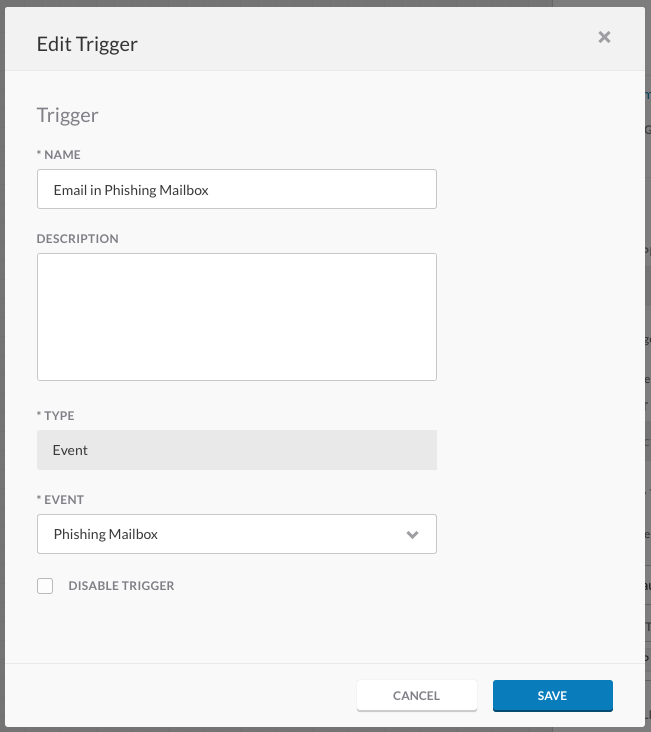
Here’s a sample of what an Email Event trigger looks like:
States
The table below shows you the possible states for triggers and what they mean.
| State | Description |
|---|---|
| created | The trigger was created but has not started listening for events yet |
| started-polling | The trigger is running normally and waiting for events |
| stopped-polling | The trigger is disabled |
| paused-polling | The trigger is paused due to rate-limiting |
| errored | The trigger encountered an error and is not running. This could be due a configuration issue with the trigger or related targets. Verify the configuration and try disabling/re-enabling the trigger |
| update-in-progress | A change has been made to the trigger and is currently being saved |
| disabled | The trigger is disabled |